Maintaining the pristine appearance of painted surfaces can be quite a challenge. Whether you’re faced with walls, furniture, or treasured artwork, the delicate art of cleaning paint finishes requires a meticulous approach to ensure their enduring magnificence. In this comprehensive guide, we will delve into the intricacies of cleaning paint finishes, providing you with expert insights, invaluable tricks, and proven practices. So, gather your reliable cleaning supplies and get ready to embark on a journey of enlightenment and mastery!
Understanding the Importance of Proper Paint Finish Cleaning
Painted surfaces are not only visually appealing but also serve as protective layers for your walls, furniture, and other items. Over time, dust, dirt, fingerprints, and other contaminants can accumulate on these surfaces, dulling their shine and diminishing the overall aesthetic appeal. Regularly cleaning your paint finishes is essential to maintain their beauty, prevent damage, and extend their lifespan.

Preparing for Paint Finish Cleaning
Gather the Necessary Tools and Supplies
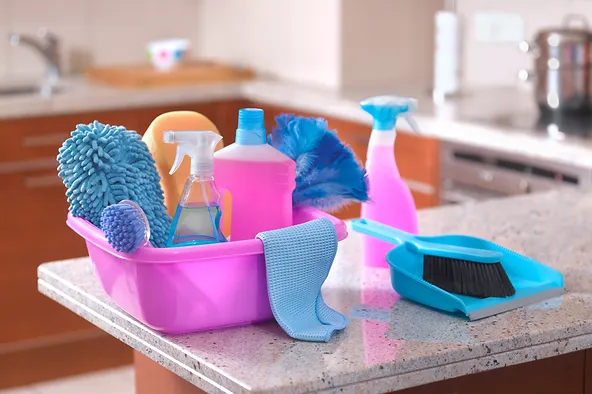
To ensure an effective and efficient cleaning process, it is crucial to have the right tools and supplies at your disposal. Here are some items you’ll need:
- Soft microfiber cloths: These non-abrasive cloths are perfect for gentle cleaning without scratching or damaging the paint finish.
- Mild detergent or soap: Choose a gentle cleaning solution that does not contain harsh chemicals that could potentially strip away the paint or cause discoloration.
- Bucket of warm water: Dilute the mild detergent or soap in warm water to create a cleaning solution.
- Soft-bristle brush: Opt for a brush with soft bristles to remove stubborn stains or dirt gently.
- Vacuum cleaner with brush attachment: This is useful for removing loose dust and debris from the painted surface before cleaning.
Precautionary Measures
Before you begin the cleaning process, take the following precautionary measures:
- Test in an inconspicuous area: To ensure the cleaning solution does not adversely affect the paint finish, test it on a small, hidden area first.
- Protect adjacent surfaces: If you are cleaning walls, cover adjacent furniture or flooring with drop cloths or plastic sheets to prevent any accidental damage.
Step-by-Step Guide to Cleaning Paint Finishes
Step 1: Dusting the Surface
Before applying any cleaning solution, it is important to remove loose dust and debris from the paint finish. Follow these steps:
- Attach the brush attachment to your vacuum cleaner.
- Gently run the brush attachment across the surface, using a light sweeping motion to pick up loose dirt, dust, and cobwebs.
Step 2: Preparing the Cleaning Solution
Now that the surface is free of loose debris, it’s time to prepare the cleaning solution:
- Fill a bucket with warm water.
- Add a small amount of mild detergent or soap to the water.
- Mix the solution gently until it is well combined.
Step 3: Cleaning the Paint Finish
Proceed with the following steps to clean the paint finish effectively:
- Dip a soft microfiber cloth into the cleaning solution, ensuring it is damp but not soaking wet.
- Wring out any excess liquid to avoid leaving watermarks on the paint.
- Starting from the top of the surface, gently wipe in a circular or back-and-forth motion, working your way downward.
- Pay extra attention to areas with visible stains or dirt, using a soft-bristle brush if necessary. Be gentle to avoid scratching the paint.
- Rinse the cloth regularly in the cleaning solution to prevent cross-contamination.
- If you encounter stubborn stains, dab a small amount of the cleaning solution directly onto the cloth and gently rub the area.
- Once you have cleaned the entire surface, rinse the cloth thoroughly and wipe it over the paint finish to remove any residue.
- Allow the surface to air dry naturally.
Step 4: Final Touches
To ensure a spotless and flawless finish, consider the following additional steps:
- Inspect the surface for any remaining stains or streaks. If necessary, repeat the cleaning process in the affected areas.
- If your paint finish has a glossy or reflective surface, use a microfiber cloth to buff it gently in circular motions, enhancing its shine.
- Take a step back and admire your beautifully cleaned and refreshed paint finish.

Maintaining the Cleanliness of Paint Finishes
Now that your paint finishes are gleaming, it’s essential to implement maintenance practices to preserve their cleanliness and longevity:
- Regular dusting: Use a soft microfiber cloth or a duster to remove dust and debris from the surfaces.
- Spot cleaning: Promptly clean any spills or stains to prevent them from setting and becoming more difficult to remove.
- Avoid harsh chemicals: When selecting cleaning products, opt for those specifically formulated for painted surfaces, and avoid abrasive or chemical-laden cleaners that could damage the paint.
- Protect from direct sunlight: Prolonged exposure to sunlight can cause fading or discoloration of paint finishes. Consider using curtains, blinds, or window films to shield your painted surfaces from direct sunlight.
- Professional touch-ups: If your paint finishes sustain significant damage or become worn over time, consider hiring professionals to perform touch-ups or repaint the affected areas.
Conclusion
Cleaning paint finishes requires a delicate touch and attention to detail. By following the outlined guide, you can achieve immaculate results and ensure your painted surfaces remain visually stunning for years to come. Remember, regular maintenance and care are key to preserving the beauty and longevity of your paint finishes. If you ever require professional assistance or further guidance, Liberty Painting is here to provide expert painting services tailored to your needs.


Great article! I appreciate the clear and insightful perspective you’ve shared. It’s fascinating to see how this topic is developing. For those interested in diving deeper, I found an excellent resource that expands on these ideas: check it out here. Looking forward to hearing others’ thoughts and continuing the discussion!
Very interesting subject, thank you for posting.Money from blog